


Table of contents
- What are coins?
- What are tokens?
- Coins vs Tokens
- How to Create Your Cryptocurrency?
- Step 1:- Choose the blockchain platform
- Step 2:- Define your token properties
- Step 3:- Develop a Smart contract
- Step 4: Run QA on the test network
- Step 5: Verify our contract.
- Step 6:- Import your tokens to your wallet
- Step 6:- Mint and transfer your new cryptocurrency
If you are a cryptocurrency enthusiast you may hear the words "coin" and "token", and some of you still don't know the difference between them.
Before we start deploying our token on the blockchain let's first understand what's the difference between coins and tokens on the blockchain.
What are coins?
The original design of decentralized payment solutions is a distributed ledger system that stores information about transactions performed using a native cryptographic asset. This asset is referred to as a coin and is the only asset supported by the blockchain.
Ex. Bitcoin, Dogechain
What are tokens?

Tokens exist on pre-existing blockchains. For example Uniswap’s native digital token is UNI, and since UNI is built on Ethereum, a pre-existing blockchain, it qualifies as a token.
Coins vs Tokens
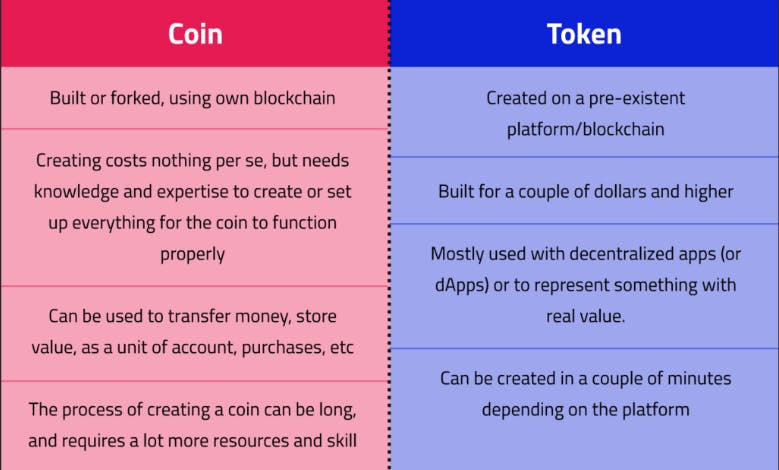
Ref:- A Comprehensive Guide to Creating A Cryptocurrency - MVP Workshop
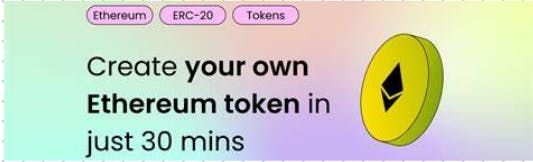
So now we know the difference between coins and tokens, we can start creating our token.
How to Create Your Cryptocurrency?
We can create our own cryptocurrency using the existing blockchain. Platforms like the Ethereum blockchain are designed to host the cryptocurrencies of many different developers. And this new cryptocurrency is classified as a token.
Creating your cryptocurrency required moderate computer knowledge, anyone with some technical expertise can create their token without much difficulty, so here is a step-by-step guide to creating your token.
Step 1:- Choose the blockchain platform
So the first thing we have to do is to select the blockchain platform which should host your token. You can select any one there are many but the Ethereum platform and Binance Smart Chain are the most popular.
Note:- For this guide, we will use Ethereum. we will create an ERC-20 token.
Step 2:- Define your token properties
In this step, we will decide what our token will do. So here we are creating an ERC-20 so we will be able to specify the following properties.
total token supply
token’s name, symbol, and number of decimals
and a couple of auxiliary functions to check balances on addresses, enable and verify transactions
If it's an NFT it will have different parameters.
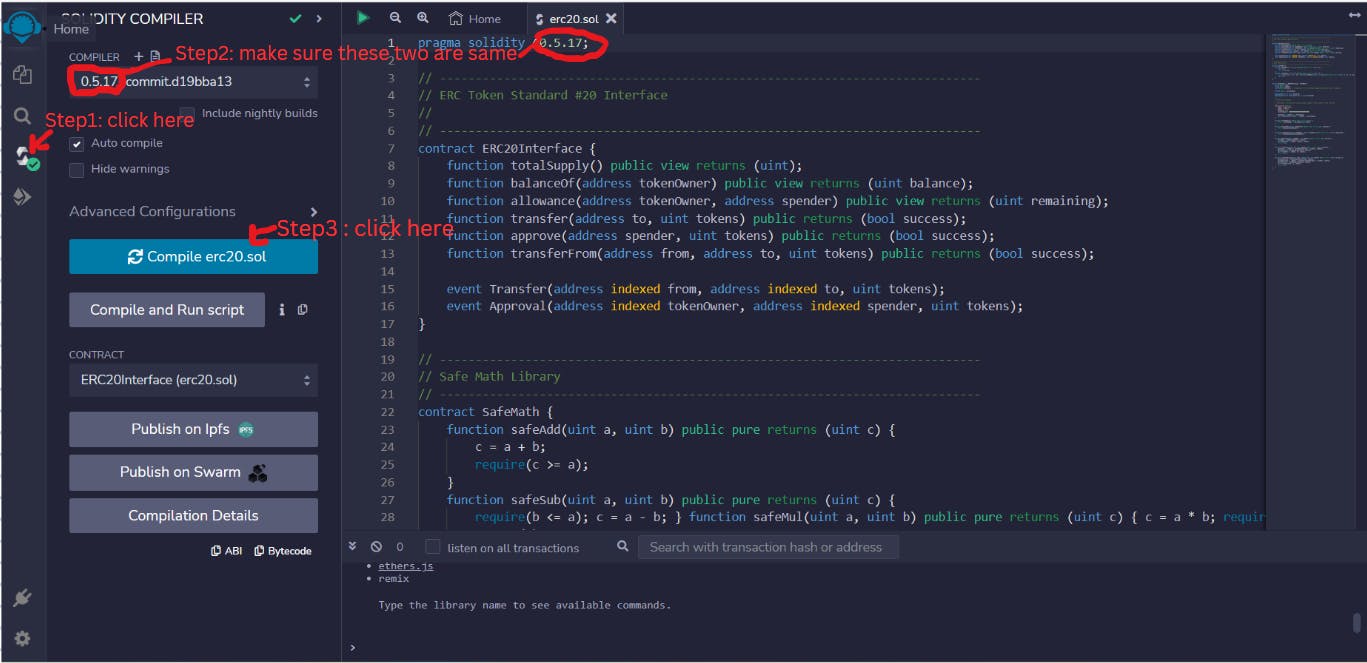
Step 3:- Develop a Smart contract
This is a crucial step of creating a token. Any crypto token is governed by a smart contract so to create your token you need to code a smart contract.
To create a smart contract go to Remix - Ethereum IDE & community (remix-project.org) and create a file with extension .sol (solidity file).
So here i have already created a smart contract for your reference. I will tell you the important parameter we can change in the contract to define our token properties
Erc-20-token-smart-contract/erctoken.sol at main · navdiya-nikunj/Erc-20-token-smart-contract (github.com)
You can understand or create yourself with the help of the following link.
Understand the ERC-20 token smart contract | ethereum.org
First, you can change your contract name in the above contract and then you can change the parameter on the constructor (line 49).

We can define our token's name, symbol and number of decimals. We can also even specify the total supply.
you can see there are a couple of functions for different purposes.
Now we wrote a code of smart contract and compile it. Go to the third button on the left sidebar. and click on Compile yourcontractname.sol , make sure you are compiling with the right compiler.
Step 4: Run QA on the test network
Now we will first check if there is any bug or not by testing it on the test network.Here we will test it on Sepolia test network. for this, you should have metamask installed in your browser.
Go to the deploy contract button which is the fourth button on the left sidebar
Select environment as Injected Provider - MetaMask.
get some SepoliaEth from here Sepolia Faucet
check the contract name (it should be here NiksToken for me)
click on deploy

After deploying you will see something like this in the terminal. click on view on etherscan.
It will redirect you to blockchain explorer. in there click on the contract address and you will see the information about the contract and our token's info.


horray we made it without bugs
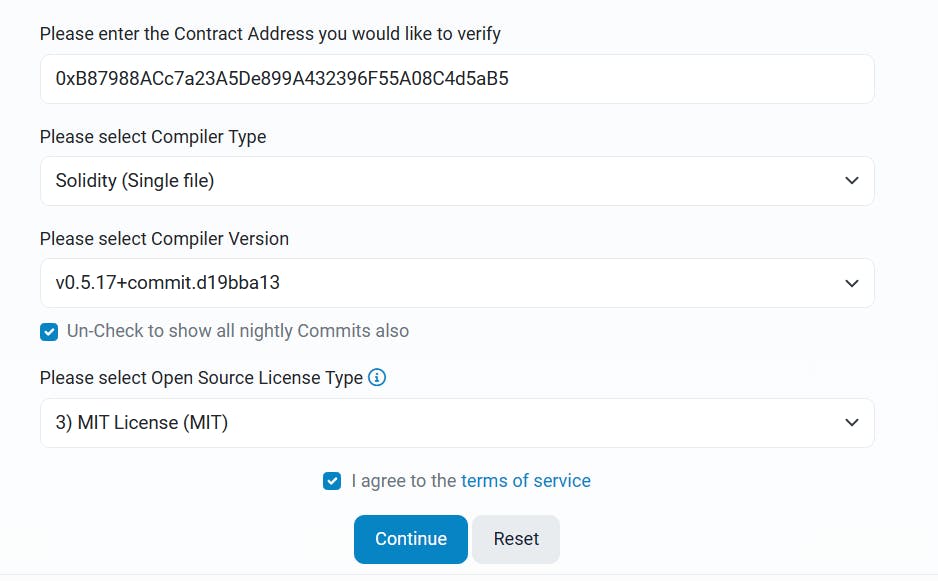
Step 5: Verify our contract.
Go to Verify & Publish Contract Source Code | Etherscan and fill in the details and verify and publish the contract.

Here we go we have created our own token !!!
After successful verification of your contract, your screen will look like this with your smart contract address, contractBytecode and ContracrABI.

now you can read your contract as well as transfer your tokens to another account. You can also deploy the contract using mainnet too.
To read your contract just click on the contract address and you will be redirected to the contract address information page of etherscan. This time in the contract tab it shows the `Contract Source Code Verified`

Step 6:- Import your tokens to your wallet
To import your token into your metamask wallet we will need the smart contract address on which we have created our token
So for this follow the following steps:-
open your metamask wallet and go to assets.
In the bottom section, there will be an
import tokenoption clicks on it.Add the smart contract address there and the remaining fields.
click on
Add custom token.Hurrayyyy!! you created your token

After you imported the token you can see them in assets.

Step 6:- Mint and transfer your new cryptocurrency
After creating the cryptocurrency, you are ready to mint the new tokens. And you can also transfer these tokens to other wallet addresses too.
Thank you for reading!!! If you like it then give it a like and follow for more blogs😊
I have written this blog as a part of Implementation deepdive challange By technical writer apprentice of alchemy University.